CLI privacy audit
This walkthrough uses the command line. See Install first, or follow the separate Desktop privacy audit example. Read Audit modes to distinguish a privacy audit from a dataset comparison and its optional checks.
Install dicomqc and verify dicomqc --version before running the commands below.
Try the built-in demo
Generate three synthetic DICOM files and audit them:
dicomqc demo
Data and expected findings
The files are in dicomqc-demo/dicom/. All names, identifiers, and dates below
are invented for the example.
| File | Synthetic metadata | Expected findings |
|---|---|---|
raw_phi.dcm | Name Smith^Jane, ID LOCAL123, birth date 19700101, and a private creator tag | 1 error for the birth date; 3 warnings for the name, ID, and private tag |
pseudonymized.dcm | Name and ID SUBJ001; no birth date or private tags | No findings |
private_tags.dcm | Name and ID SUBJ002; no birth date; a private creator tag remains | 1 warning for private tags |
Expected total: 3 files read, 1 error, 4 warnings. The private-tag warning asks for review; it does not establish that the tag contains identifying data. Likewise, a matching pseudonym format is not proof that a file is safe to share.
The demo intentionally includes findings, so the reported scan exit code is 2.
The demo command itself exits 0 when the example was generated correctly.
Open the reports
Open dicomqc-demo/dicomqc/report.html in a browser. It shows the five findings
as four grouped issues: the private-tag issue covers two files.
The HTML is self-contained and works offline; no server, MultiQC installation,
or additional Python packages are needed.
View the HTML report for this scan
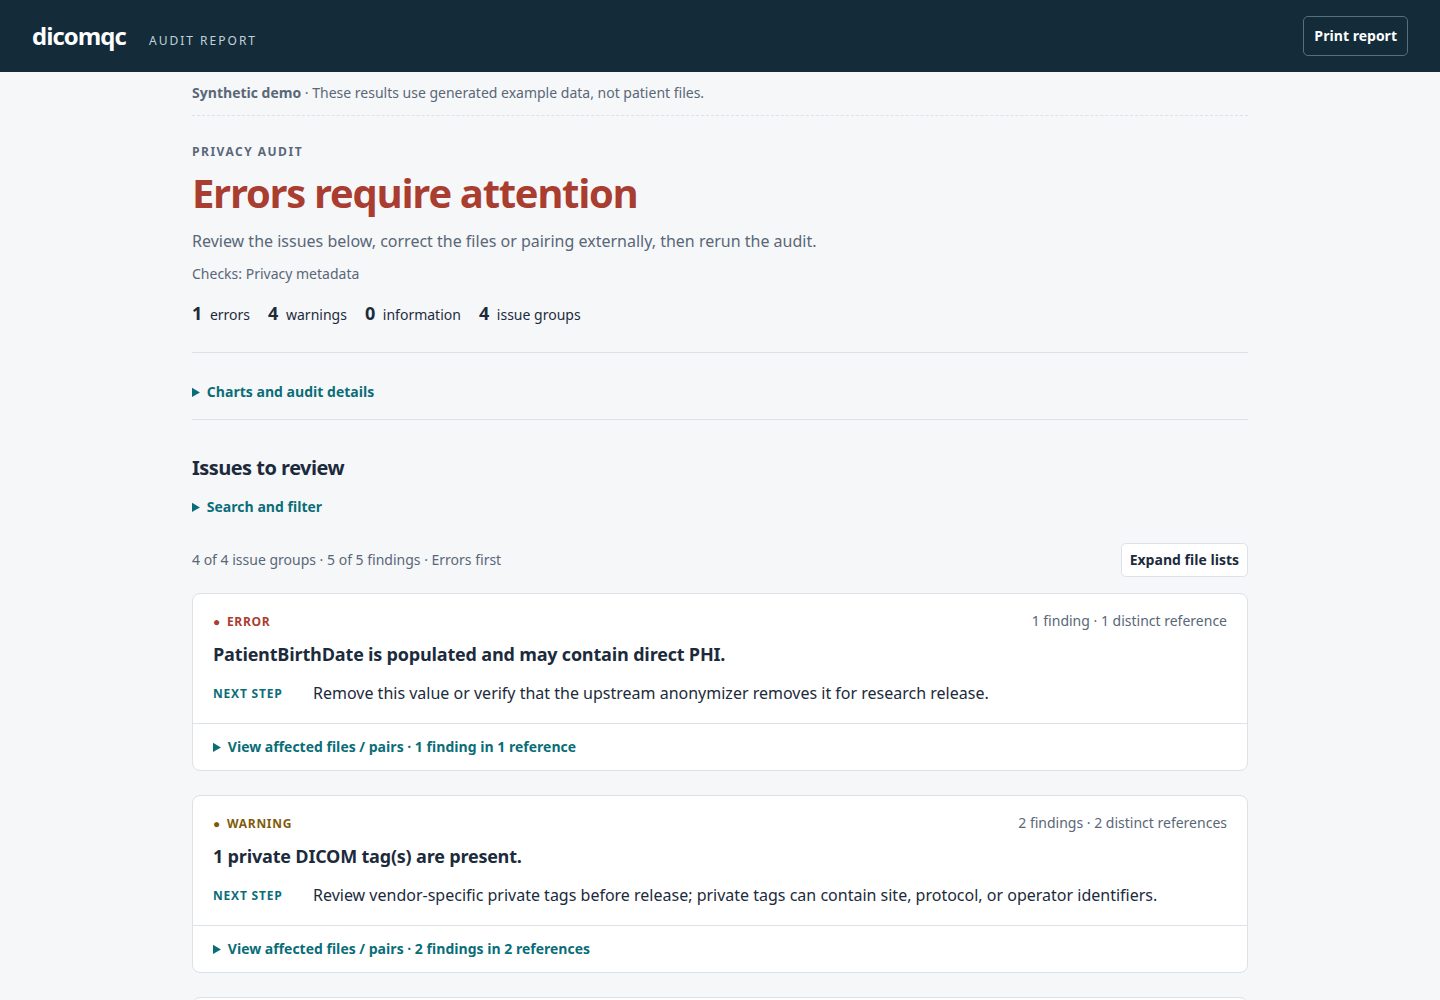
Review the HTML report
Each issue shows its recommended action once. Expand View affected files / pairs to see the individual findings; errors appear before warnings and information.
Reading and printing the HTML report
- Charts and audit details contains counts, scope, profile, and any project policy ID and SHA-256 digest. This panel and Search and filter start closed.
- Search matches files, rules, fields, and recommendations. Matching occurrence lists open automatically. Category, severity, and search filters combine.
- Clicking a category bar applies that filter. Reset filters clears filters and collapses lists. Charts always summarize the full audit; category bars count findings, not unique files.
- Expand file lists opens the visible groups together. Rule IDs and standards references are inside these lists.
- Print report includes every finding and supporting detail, even when filtered or collapsed. The browser's print command works too.
- Without JavaScript, all issues remain visible and file lists can still be expanded; filters are unavailable.
Groups share a rule, severity, message, recommendation, and standards references. Repeated fields remain separate occurrences. Narrow screens use labeled rows instead of wide occurrence tables. This demo's HTML does not embed raw records or tag values. The optional vendor inventory explicitly includes observed equipment and creator labels.
The same findings are written to dicomqc-demo/dicomqc/findings.csv;
dicomqc-demo/dicomqc/report.json also includes the scan summary and file
metadata. See output formats for their
structure and report privacy
before sharing them.
Rerun the analysis
Audit the generated files again and replace their reports:
dicomqc scan dicomqc-demo/dicom \
  --html dicomqc-demo/dicomqc/report.html \
  --json dicomqc-demo/dicomqc/report.json \
  --csv dicomqc-demo/dicomqc/findings.csv
This scan command returns 2, because the example still contains the same
error and warnings. It does not change the DICOM files.
View the same scan in MultiQC
This step is optional. The demo also writes a MultiQC bundle in
dicomqc-demo/dicomqc/dicomqc_mqc/. With MultiQC installed, render it with:
multiqc dicomqc-demo/dicomqc --outdir dicomqc-demo --force
Open dicomqc-demo/multiqc_report.html. This displays the same scan findings;
MultiQC does not run another DICOM audit.
View the MultiQC overview, status, and findings
The overview shows the same one error and four warnings.
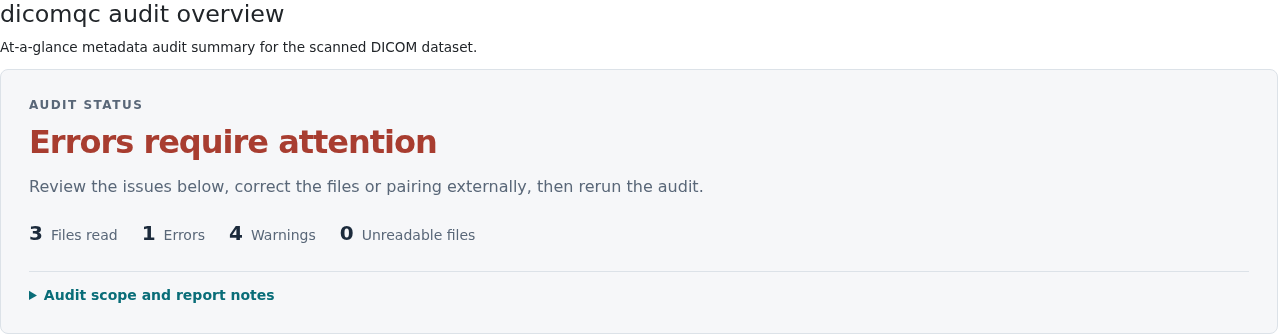
The status table summarizes the audit counts.

The findings table lists the five findings and recommended actions.
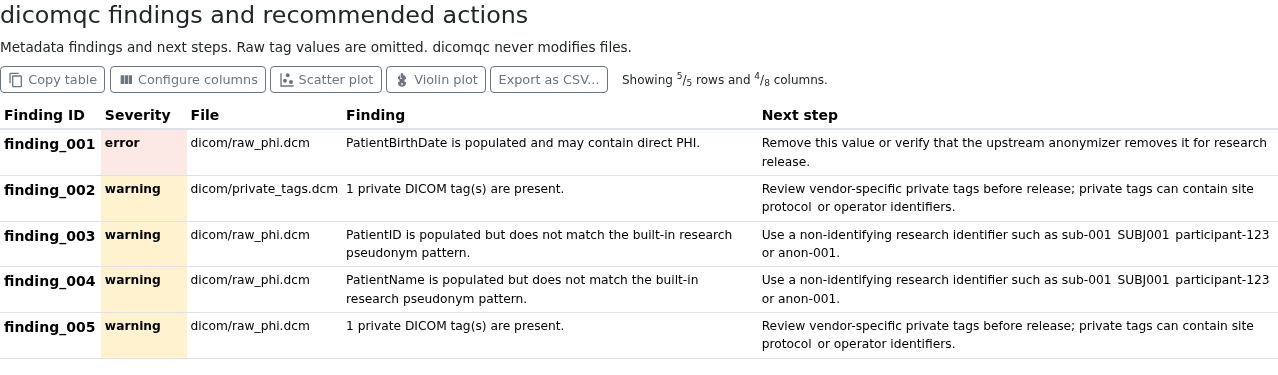
To refresh that bundle after another audit, run:
dicomqc scan dicomqc-demo/dicom --multiqc dicomqc-demo/dicomqc/dicomqc_mqc
Then rerun the MultiQC command above. For other examples, follow the complete dataset comparison or project policy walkthrough.
MultiQC controls and bundle files
--multiqc writes custom content, not a finished HTML report. MultiQC displays
general statistics, an audit overview, a status table, and individual findings
with recommended actions. Technical columns start hidden; use Configure columns
to show rule IDs, tags, and value states. Project policy details appear in the
overview's expandable notes.
HTML and MultiQC share the same status wording: Errors require attention, Warnings require review, Checks passed, or No readable files. These describe the audit, not permission to share data. MultiQC retains its own tables and export controls; standalone HTML groups repeated findings into issues.
The bundle contains *_mqc.yaml files and an HTML overview. Keep its output
directory separate from inputs, policy files, and other report outputs.
Existing bundle files are replaced when you rerun the export. Legacy filenames
and internal IDs containing release_status remain for compatibility; visible
labels say Audit status.
Scan a dataset
Scan a study directory:
dicomqc scan study/ --html report.html --json report.json --csv findings.csv
The scanner recursively attempts regular files under the provided path. DICOM
files do not need a .dcm extension.
Exit codes
| Code | Meaning |
|---|---|
0 | No warnings or errors |
1 | Warnings only |
2 | Validation errors or fatal scan failures |
Default profile
The default profile is research-release-v0.1. It flags direct identifiers,
warns when patient identifiers do not match the expected pseudonym format, and
lists private tags for review.
Fixing findings
dicomqc does not modify DICOM files. If it reports required changes, apply them with a pseudonymization or anonymization tool, then rerun the scan. See Remediation for examples with external tools.
For the intended multiple sclerosis MRI use case, see MS MRI Workflow.