Privacy audit
Inspect a dataset, usually after an external tool has de-identified it. No source dataset, pairing manifest, or YAML policy is required.
Run the synthetic example
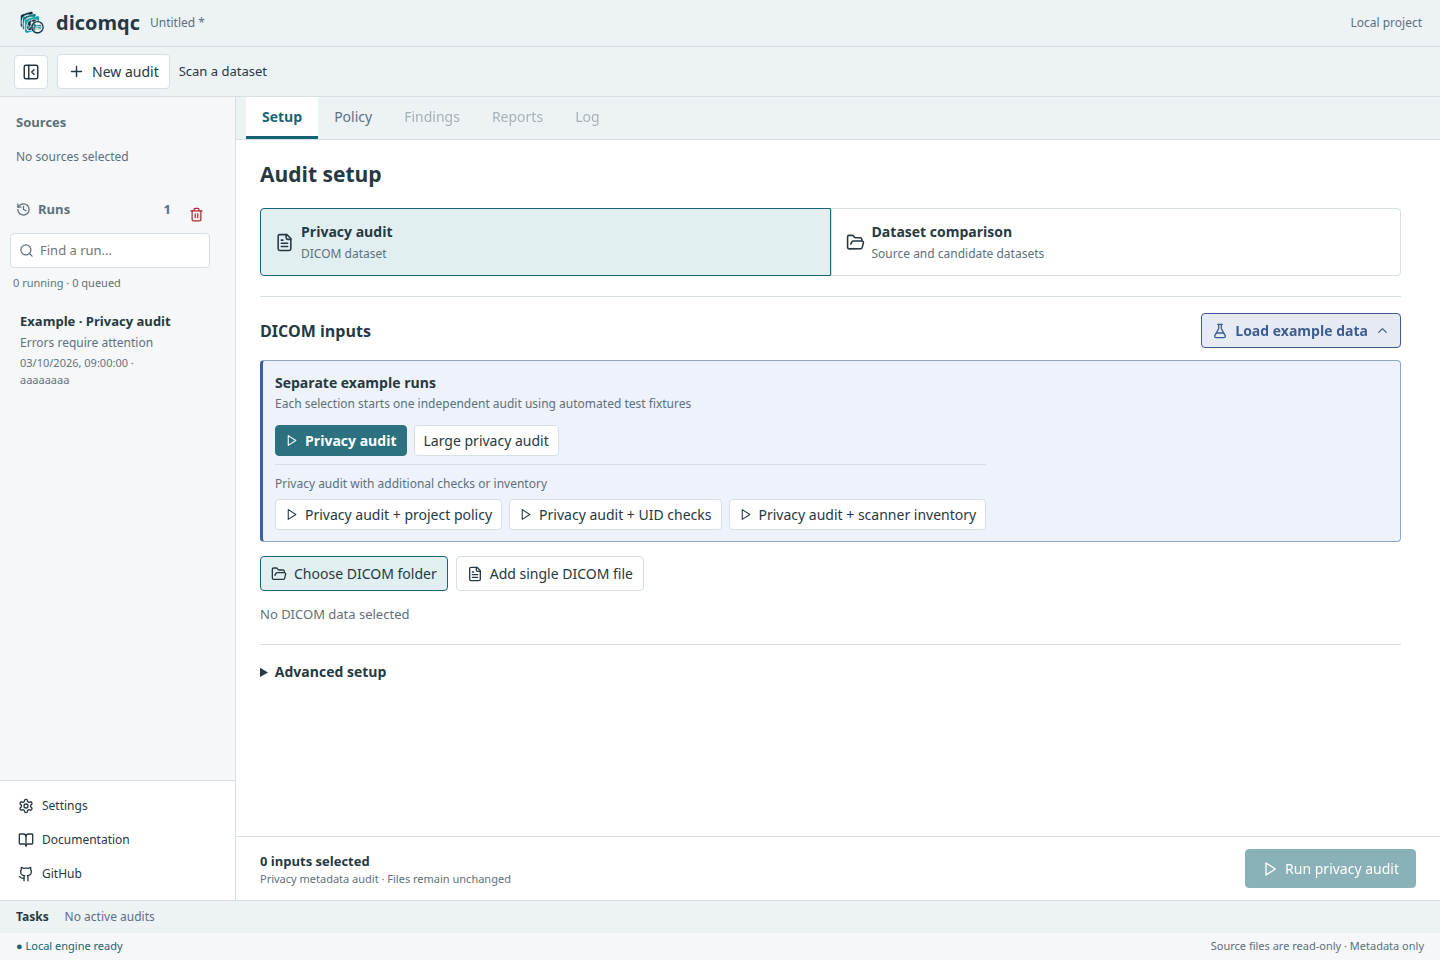
- In Setup, select Privacy audit.
- Open Load example data beside DICOM inputs.
- Select Privacy audit. This generates the fixtures and starts a run.
- Select that run and open Findings.
The example uses the same fixture generator as the automated tests. All patient information is invented. Expect 3 files read, 1 error, and 4 warnings:
| File | Findings |
|---|---|
raw_phi.dcm | Birth date error; warnings for patient name, patient ID, and private tags |
pseudonymized.dcm | No findings |
private_tags.dcm | Private-tag warning |
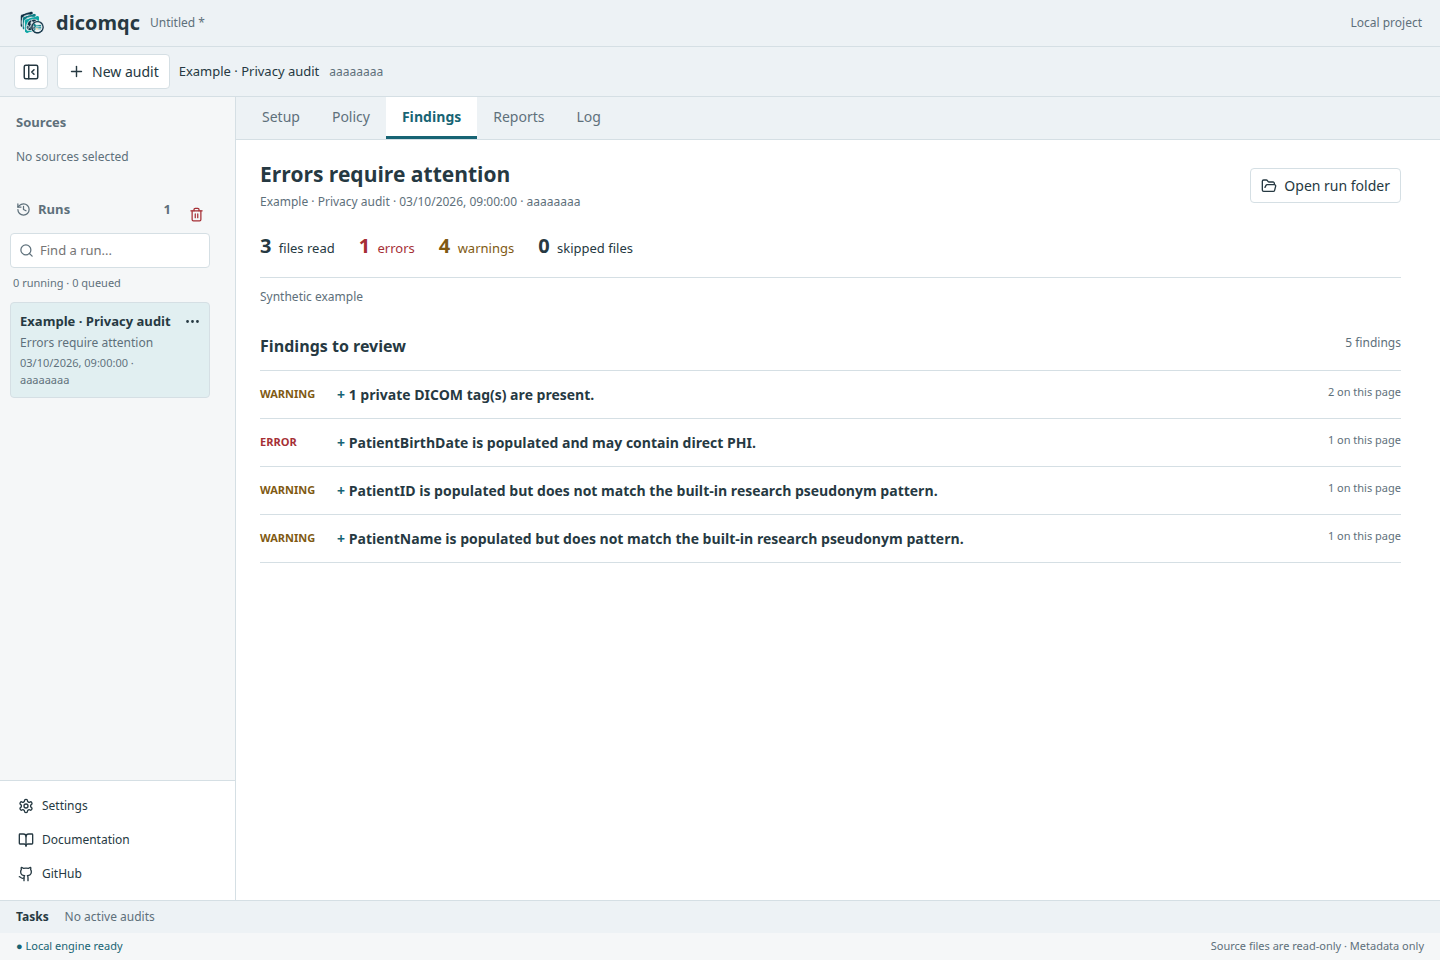
An error finding is an audit result, not a failed application job. A private-tag warning asks for review; it does not prove that the tag identifies a patient.
Inspect and retain the result
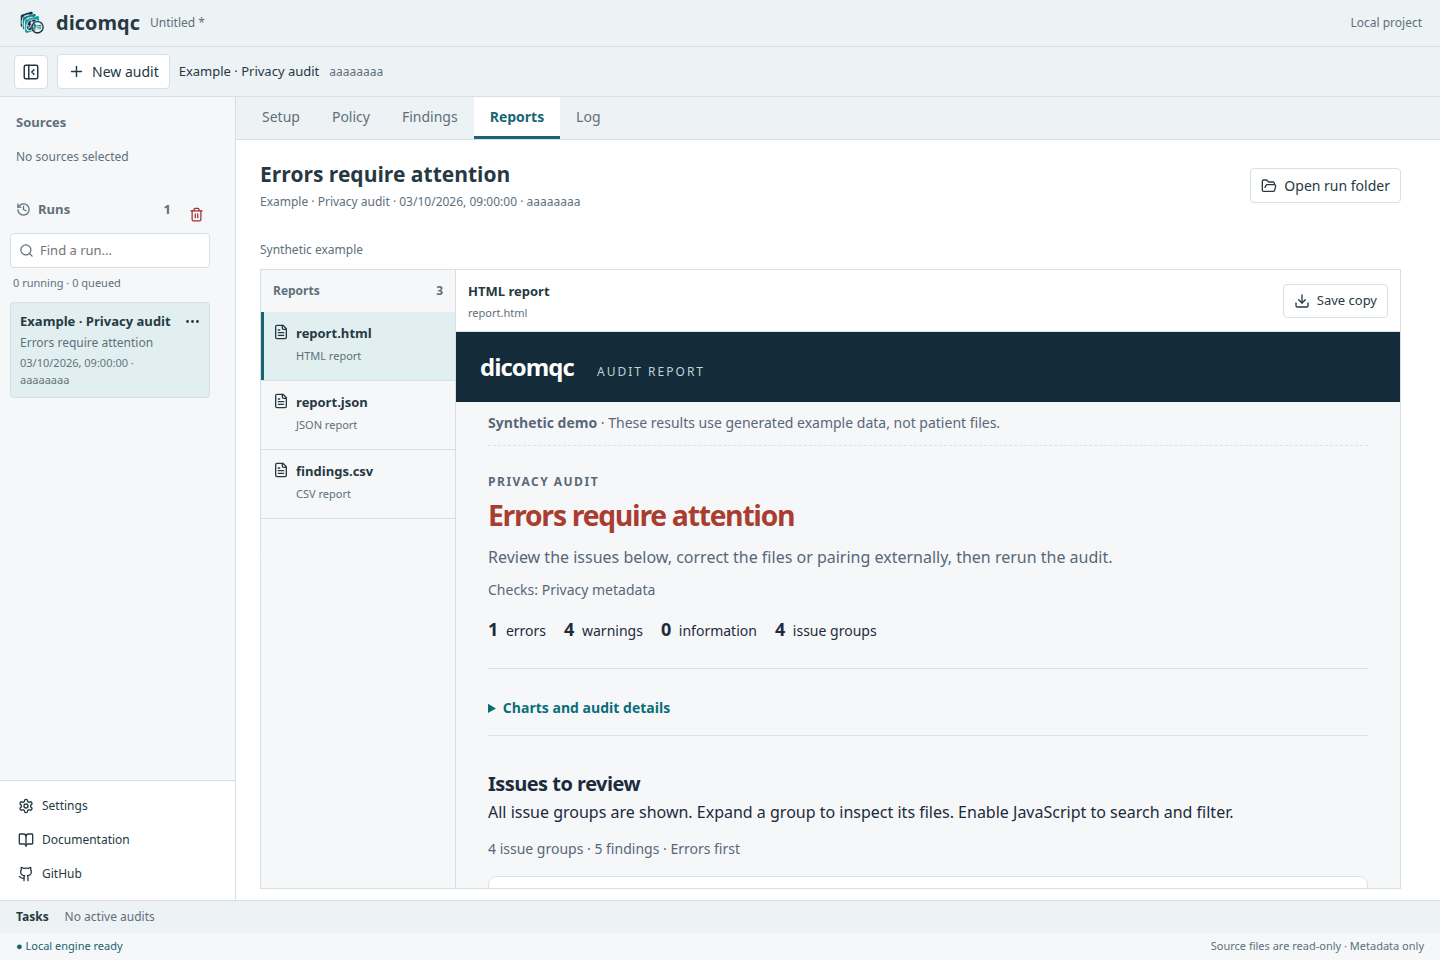
Open Reports and select HTML. The five findings form four grouped issues because the private-tag issue affects two files. CSV provides a sortable, paginated table; JSON provides an expandable structured view.
Use Log for parameters and timing. File > Save Project retains runs and
reports in a .dicomqc file; Save copy exports an individual report.
Audit your own dataset
Return to Setup. Use Choose DICOM folder for a directory and its subdirectories, or Add single DICOM file for one file. Select Run privacy audit. Add optional checks when needed.
Inputs remain unchanged. Correct problems with your external de-identification tool and audit the regenerated dataset. A clean metadata report does not rule out identifying pixels or other untested risks.