Desktop App
Pheno-Ranker Desktop provides a local graphical interface for patient ranking, cohort comparison, and companion tools. It uses the same analysis engine as the CLI, while adding guided setup, run history, and interactive results.
Desktop runs analyses on your computer. Similarity results support research and exploration; they do not provide a clinical interpretation or diagnosis.
Install Desktop
Download the installer for your operating system and processor from GitHub Releases. The Pheno-Ranker engine and runtimes are included; Perl, Python, and Node.js do not need to be installed separately. On the release page, expand Assets and choose an installer rather than one of GitHub's automatic source-code archives.
- Windows
- macOS
- Linux
Download pheno-ranker-windows-x86_64-setup.exe, run it, then open
Pheno-Ranker from the Start menu. The installer is not code-signed, so Windows
may show SmartScreen. Confirm that the file came from the project release before
selecting More info > Run anyway.
Choose macos-apple-silicon.dmg or macos-intel.dmg to match
About This Mac. Open the DMG and drag Pheno-Ranker into Applications.
The app is not Apple-notarized; if macOS blocks the first launch, use
System Settings > Privacy & Security > Open Anyway.
Choose linux-x86_64.AppImage for Intel/AMD or linux-aarch64.AppImage for
ARM64, then run:
chmod +x pheno-ranker-linux-x86_64.AppImage
./pheno-ranker-linux-x86_64.AppImage
The Linux build baselines are Ubuntu 22.04 for x86_64 and Ubuntu 24.04 for ARM64. AppImages still depend on a compatible host glibc.
The Desktop installers are separate from the five publication-numbered CLI
installation methods; their D, G, and C
codes remain unchanged.
Storage, updates, and removal
Where Pheno-Ranker stores application data
Desktop stores settings, run history, downloaded use-case data, and application-managed outputs separately from the installed application:
- Linux:
~/.local/share/org.cnag.pheno-ranker/(or$XDG_DATA_HOME/org.cnag.pheno-ranker/when configured). - macOS:
~/Library/Application Support/org.cnag.pheno-ranker/. - Windows:
%LOCALAPPDATA%\org.cnag.pheno-ranker\.
This per-user folder persists when the app is closed, updated, or reinstalled. That is why a new installer opened under the same account shows the existing run history. User-selected input files remain in their original locations. Results written to a custom folder in Settings also remain outside application storage.
Projects are saved wherever you choose. Keep each .phenoranker file beside
its matching .phenoranker.data directory.
Update Desktop
Quit Pheno-Ranker before updating:
- macOS: replace the app in Applications with the copy from the new DMG.
- Windows: run the newer setup executable and follow its wizard.
- Linux: replace the AppImage and restore executable permission if needed.
The existing application-data folder preserves settings and run history across the update.
Uninstall or reset
- Save projects and copy any generated results you want to keep outside the application-data folder.
- Quit Pheno-Ranker.
- To uninstall, delete the AppImage on Linux, remove Pheno-Ranker from Applications on macOS, or run the Pheno-Ranker uninstaller from the Windows Start menu or Settings > Apps > Installed apps.
- On Windows, the uninstaller asks whether to Delete app data. Leave this unchecked to preserve settings and run history for a later reinstall. Select it only when you also want to remove downloads, managed outputs, and local history. The application-data path shown above is included in that cleanup.
- On Linux or macOS, remove the application-data folder listed above only when you also want to reset settings and local history. Separately remove custom results folders only if you no longer need them.
On Windows, the installed program directory under %LOCALAPPDATA% is separate
from %LOCALAPPDATA%\org.cnag.pheno-ranker\. The program directory is removed
during uninstall; the application-data directory is removed when Delete app
data is selected.
Deleting application data without uninstalling resets the local working state; Pheno-Ranker recreates it on the next launch. It does not remove original input files, separately saved projects, or results stored in a custom folder.
Deleting the application-data folder permanently removes its local run history and application-managed outputs. Save the project or copy required outputs first.
First Analysis
- Select Cohort comparison or Patient ranking.
- Open Examples, then select Load example. Patient mode loads both the target and reference data. Nothing runs until you select Run analysis.
- Select Run analysis in the top toolbar. Follow the run on the left, then open it to inspect the results.
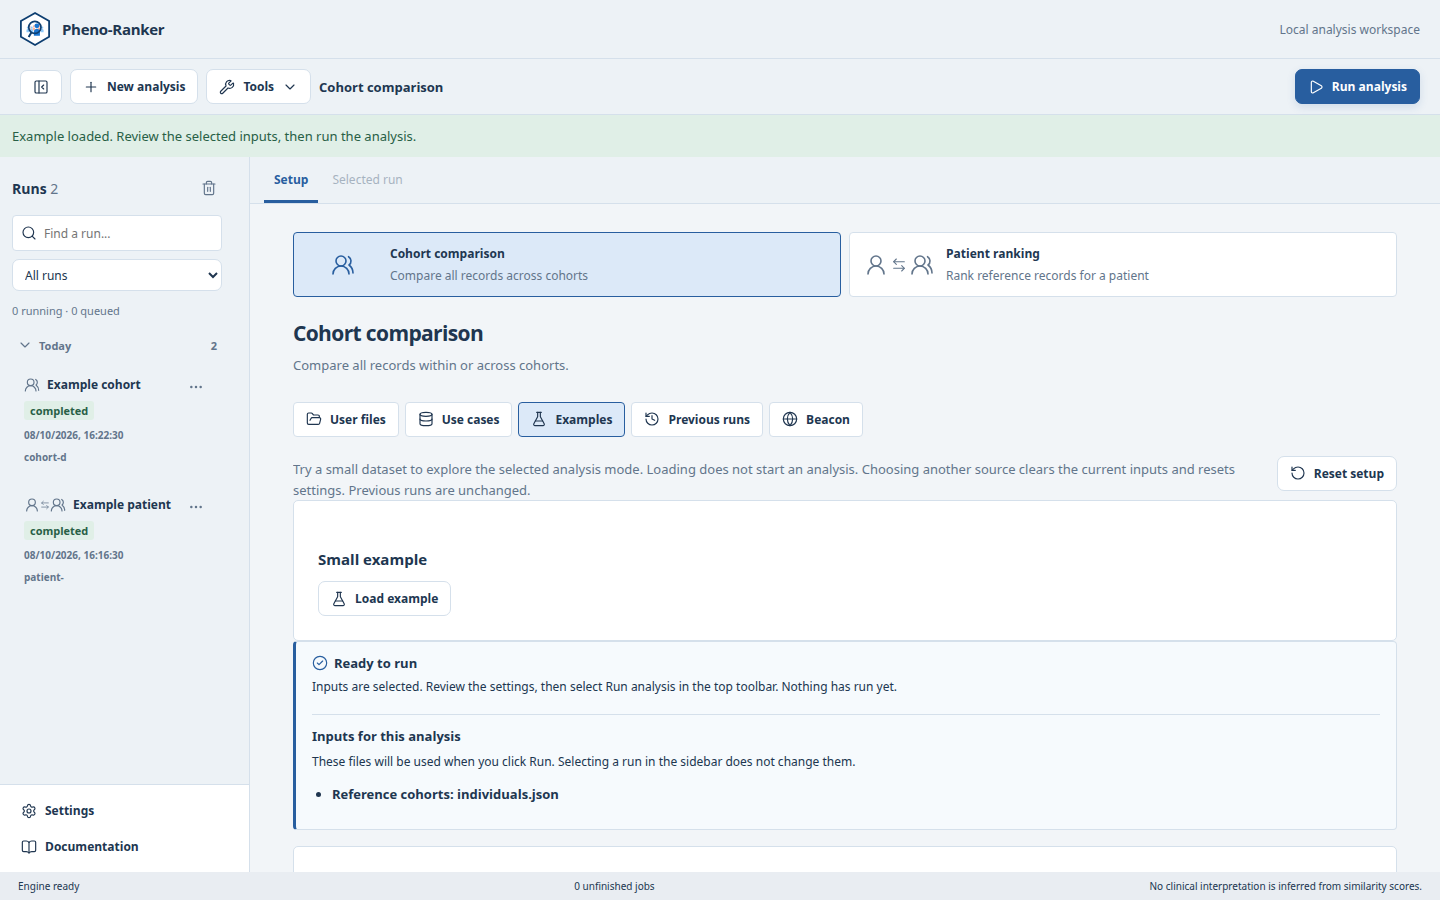
Use the defaults for a first run. Customize analysis, Output options, and Advanced settings stay folded until needed. Reset setup clears the current setup without deleting runs or original files.
Explore Results
- Patient ranking
- Cohort comparison
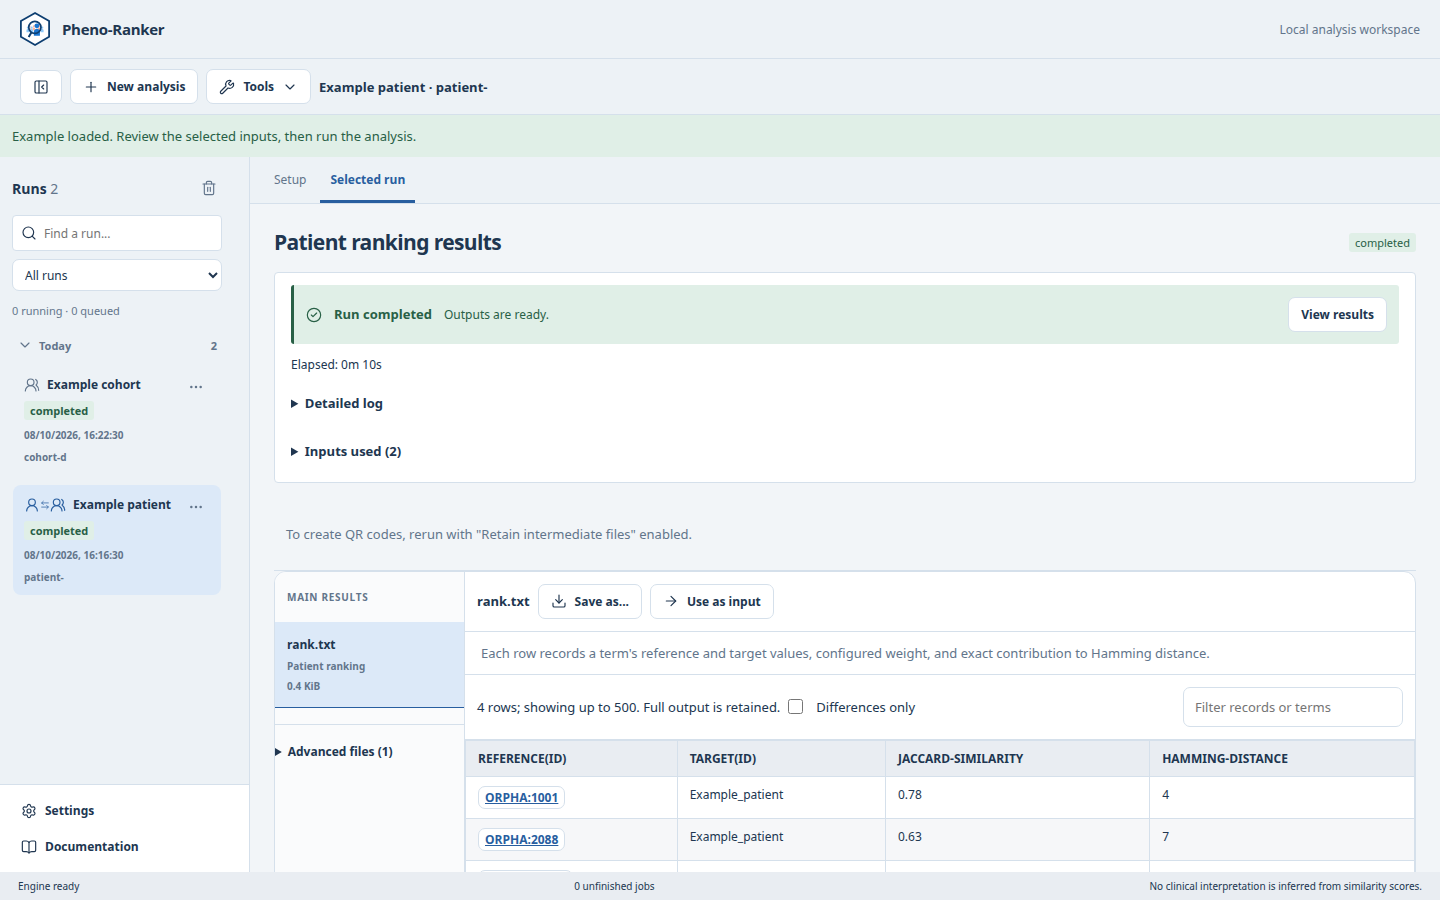
The ranking table orders reference records for the selected target. Select a reference ID to inspect the pair by entity and term, including the contribution to Hamming distance.
Cohort runs provide output files and, when requested, MDS or UMAP projections, a network, and a heatmap. Plots can be expanded to fill the window.
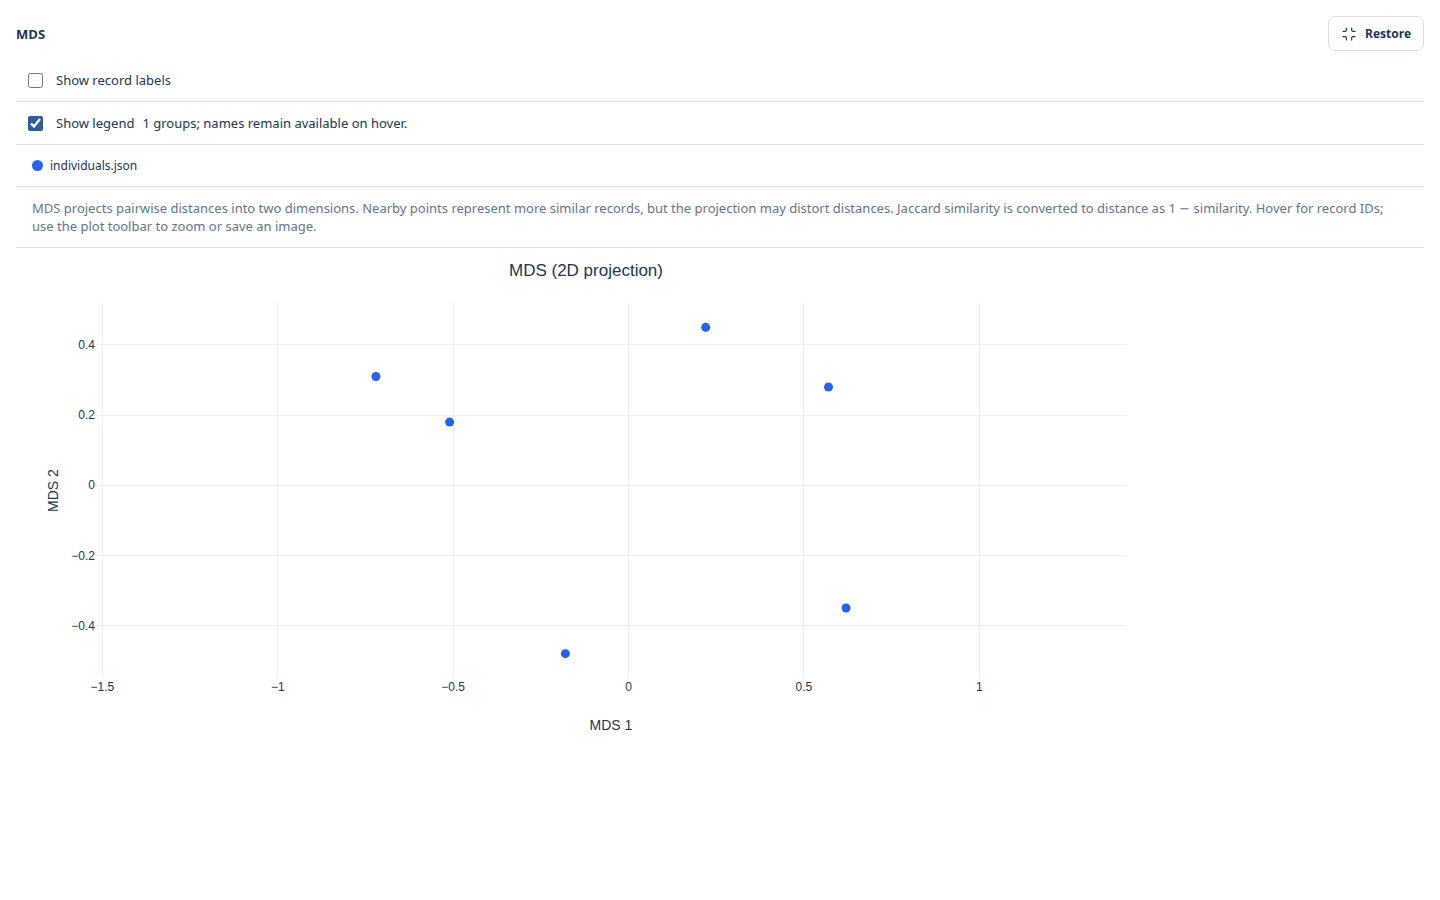
For a completed dense cohort matrix, Add projection creates MDS or UMAP coordinates without repeating the pairwise comparisons. Interactive previews may be limited for very large outputs; the complete saved files are retained. See Patient Mode and Cohort Mode for interpretation.
Choose Data
| Source | Use it for |
|---|---|
| User files | Local BFF, PXF, generic JSON, configuration, and weights files. |
| Use cases | Bundled OMIM/ORPHA references or Phenopacket Store collections. |
| Examples | A small offline analysis requiring no setup. |
| Previous runs | Reuse compatible outputs from completed jobs. |
| Beacon | Retrieve reference records from a Beacon v2 endpoint. |
Changing the source clears the current setup, not run history or original files. The input summary always shows what the next run will use.
Companion Tools
Open Tools for CSV/TSV preparation, simulated records, BFF/PXF summary reports, QR encoding and decoding, and PDF reports. Completed runs offer relevant follow-up actions using the matching outputs, reducing manual file selection.
Save Work
- Save a project from the application menu. Keep its
.phenorankerfile and.phenoranker.datadirectory together. - Set a default results folder in Settings, or choose one for a specific run.
- Deleting a run can remove history only or both history and generated outputs. Original imported files are never deleted.
Reference
OMIM, ORPHA, and precomputed references
Bundled OMIM and ORPHA use precomputed references in patient and cohort mode. Metrics, ranking limits, graph filters, and projections can still be changed. Changing data preparation, such as included terms, HPO ancestors, configuration, or weights, rebuilds the reference from the bundled source data. Cohort mode always computes the requested pairwise comparisons.
Phenopacket Store collections
Under Use cases, open Phenopacket Store collections, check the latest release, download it, and select one or more collections. Desktop verifies and caches the release, then combines the selected individual JSON files into one PXF cohort while retaining record IDs and collection membership.
Collection names colour projections and networks but do not contribute to similarity. The default MDS and UMAP limit is 10,500 records and can be changed in Settings. Large all-pairs analyses can require several GiB of RAM.
Source: Phenopacket Store.
Beacon v2 import
Under Beacon, use the BioData.pt example or enter another Beacon individuals endpoint. Optional discovered or manually entered filters are combined with AND. Page limits produce an explicitly marked partial import; disable partial imports when the complete query result is required.
See the BioData.pt API documentation.
CLI and legacy Web App UI
The CLI remains supported for scripts, remote servers, and automation. The legacy Shiny Web App UI also remains online for hosted browser use, with its original documentation.
For troubleshooting and common questions, continue to the FAQ.