Desktop Application
Convert files locally with the same core engine as the CLI. Available from Convert-Pheno 0.35. Participant data stays on your computer.
See Video Tutorials for demonstrations with synthetic data.
Install
Download the installer for your operating system and processor from GitHub Releases. The engine and runtime are included; no separate CPAN or Node.js installation is needed.
- macOS
- Windows
- Linux
macOS
Choose the Apple Silicon or Intel DMG to match About This Mac. Drag Convert-Pheno into Applications, then launch it there.
The macOS build is not Apple-notarized. If macOS blocks its first launch, open System Settings > Privacy & Security and approve the application using Open Anyway after attempting to open it.
Windows
Download and run convert-pheno-windows-x86_64-setup.exe,
then open Convert-Pheno from the Start menu. An unsigned installer may trigger
SmartScreen; check the download source before selecting More info > Run anyway.
Linux
Choose linux-x86_64 for Intel/AMD or linux-aarch64 for ARM64. For example:
chmod +x convert-pheno-linux-x86_64.AppImage
./convert-pheno-linux-x86_64.AppImage
Build baselines are Ubuntu 22.04 for x86_64 and Ubuntu 24.04 for ARM64.
AppImages still depend on the host's glibc. If an older installation reports
GLIBC_x.xx not found, use a compatible OS or the
containerized CLI.
Do not replace system glibc manually.
Where Desktop stores application data
Convert-Pheno Desktop stores run history, generated outputs, its engine log, settings, and the default resource folder separately from the application:
- Linux:
~/.local/share/org.cnag.convert-pheno/(or$XDG_DATA_HOME/org.cnag.convert-pheno/when configured) - macOS:
~/Library/Application Support/org.cnag.convert-pheno/ - Windows:
%LOCALAPPDATA%\org.cnag.convert-pheno\
If you choose another resource folder, ohdsi.db is stored there instead.
Saved .cpheno projects and their .cpheno.data folders stay in the location
you choose. Original input files remain external and are not modified. Quit the
app before manually removing its application-data folder.
First conversion
- Choose Beacon v2 as the source and CSV as the target.
- Select Load synthetic example. Required example files load together.
- Inspect the input, then select the blue Back to conversion button.
- Check the output folder and select Run conversion.
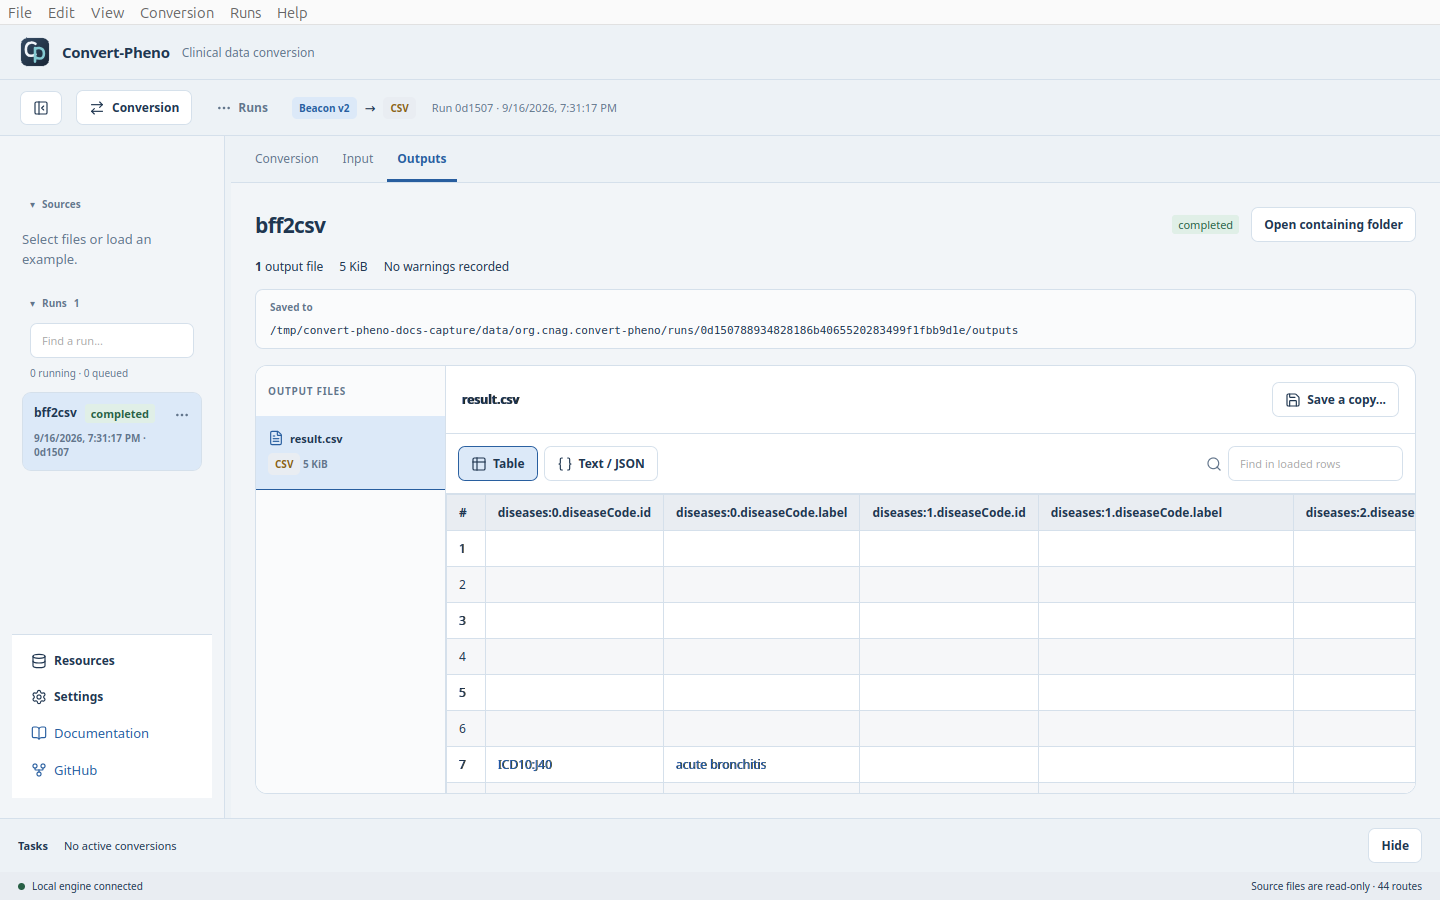
- Inspect Outputs. Use Save a copy... or Open containing folder.
Projects
Use File > Save Project and Open Project... to keep and reopen a setup.
Keep the .cpheno file and .cpheno.data folder together. Examples, pasted
JSON, and edited mappings are preserved; external inputs are referenced, not
duplicated. Locate them again if they move.
The project name appears in the window title; * marks unsaved changes.
Opening or closing a project prompts you to save or discard changes.
Conversion options
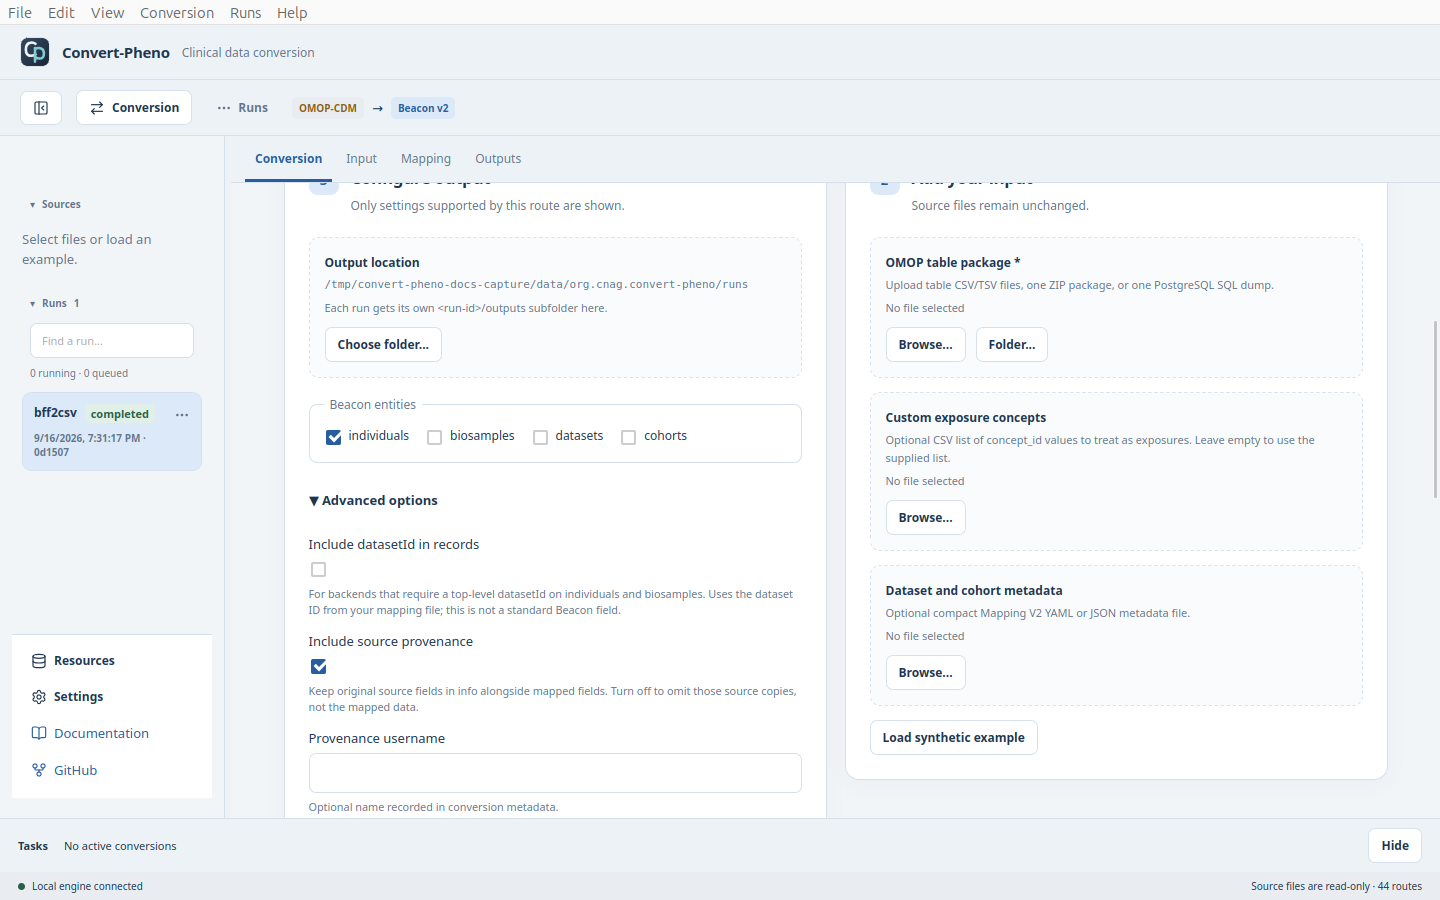
Open Advanced options under Configure output. Only settings relevant to your route appear.
Converting OMOP to Beacon with a dataset ID? Load the small metadata mapping under Dataset and cohort metadata. Enable Include datasetId in records only when your backend also requires that field on individuals and biosamples.
Provenance, datasetId, terminology, and OMOP settings
| Setting | Purpose |
|---|---|
| Include source provenance | Keep or omit original source-field copies in info; mapped fields remain |
| Include datasetId in records | Copy beacon.datasets.defaults.id to individuals and biosamples for backends requiring this non-standard extension; off by default |
| Default vital status | PXF status used when the source has none |
| Terminology search | Exact, mixed, or fuzzy; similarity controls appear for mixed/fuzzy |
| OMOP processing limit | Limit participants in non-streaming processing and rows per table in SQL imports; 0 means unlimited |
| OMOP input tables | Choose tables, or leave empty for all supported tables |
| Use installed OHDSI vocabulary | Use the installed database instead of the input CONCEPT table |
| Stream OMOP input | Reduce memory use and write line-delimited JSON for supported BFF entities |
OMOP also accepts a Custom exposure concepts file; otherwise the supplied list is used. See Mapping Files for dataset metadata and Terminology Search for matching.
Output folders and run history
Conversions run asynchronously, so you can continue using the app while a job processes your data. Follow its status in Runs, inspect earlier results, or queue another conversion. By default, jobs execute one at a time. In Settings → Maximum concurrent jobs, you can allow more conversions to run simultaneously. Each conversion generally uses one CPU core, and running more jobs is limited to the detected logical CPU count (up to 16). Running more jobs also needs more memory; this setting does not reserve CPU cores. Lowering the limit lets active jobs finish before starting more queued work. Keep the app open until your jobs finish.
Each run writes to its own folder.
Use a run's three-dot menu to cancel it, Delete from history (keep files), or Delete run and output files. The Runs menu offers bulk deletion. These actions never delete original inputs.
Inspecting output
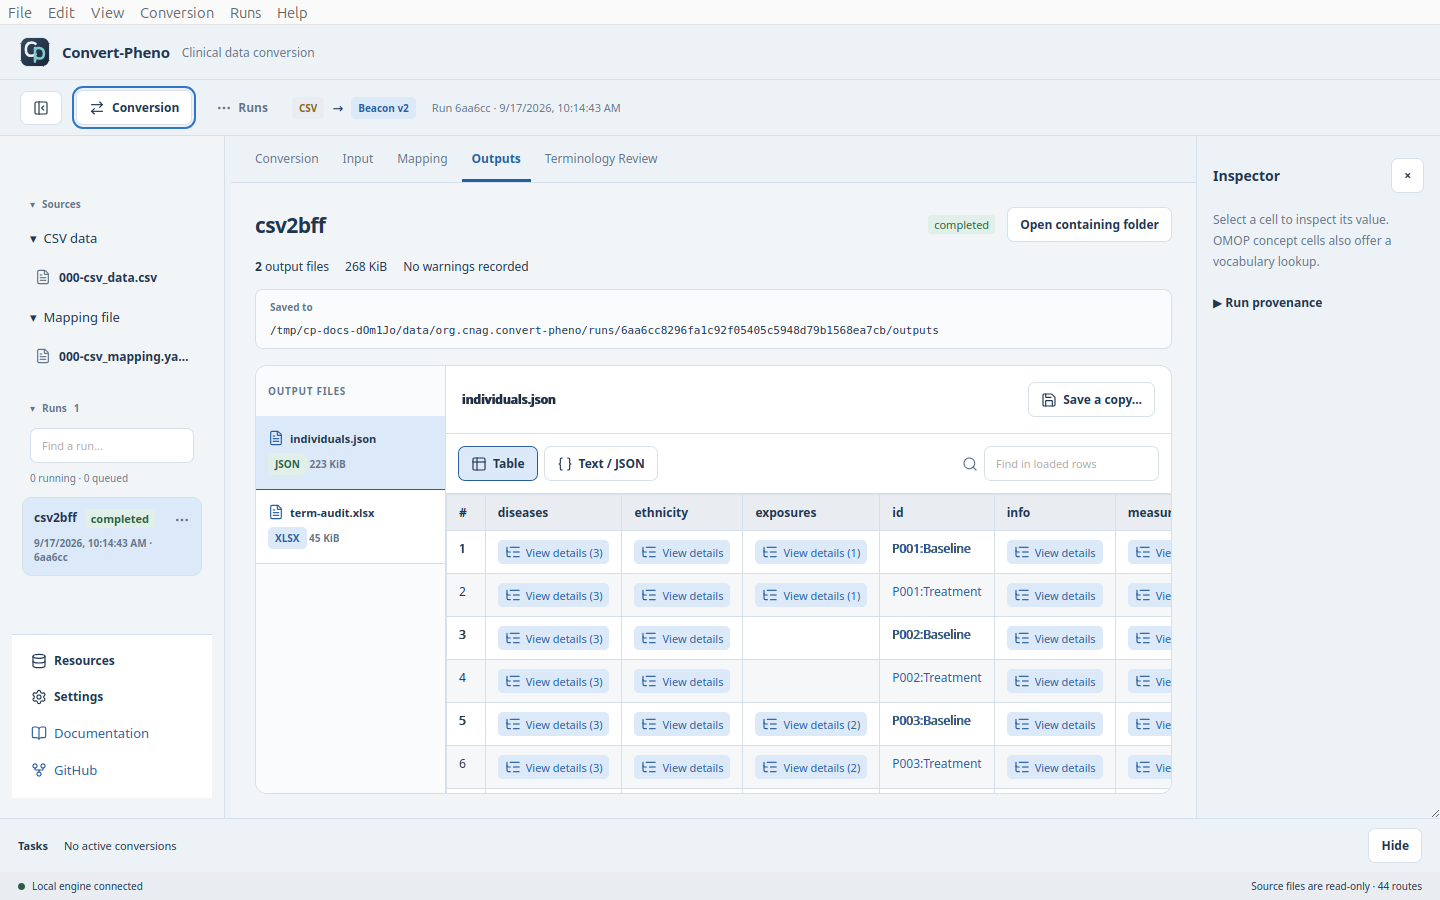
Switch between Table and Text / JSON. Select View details for nested values; copy icons copy displayed text. OMOP concept-ID cells offer a read-only lookup in the installed OHDSI database.
Compare shows run settings, output filenames, and audit counts, not record-by-record differences. Resize or collapse the left navigation as needed; choose light/dark themes in Settings.
OHDSI terminology database
In Resources, choose the resource folder, then Download and install.
The app downloads, verifies, and installs ohdsi.db. Keep it open until finished.
Already have the file? Use Install from file.
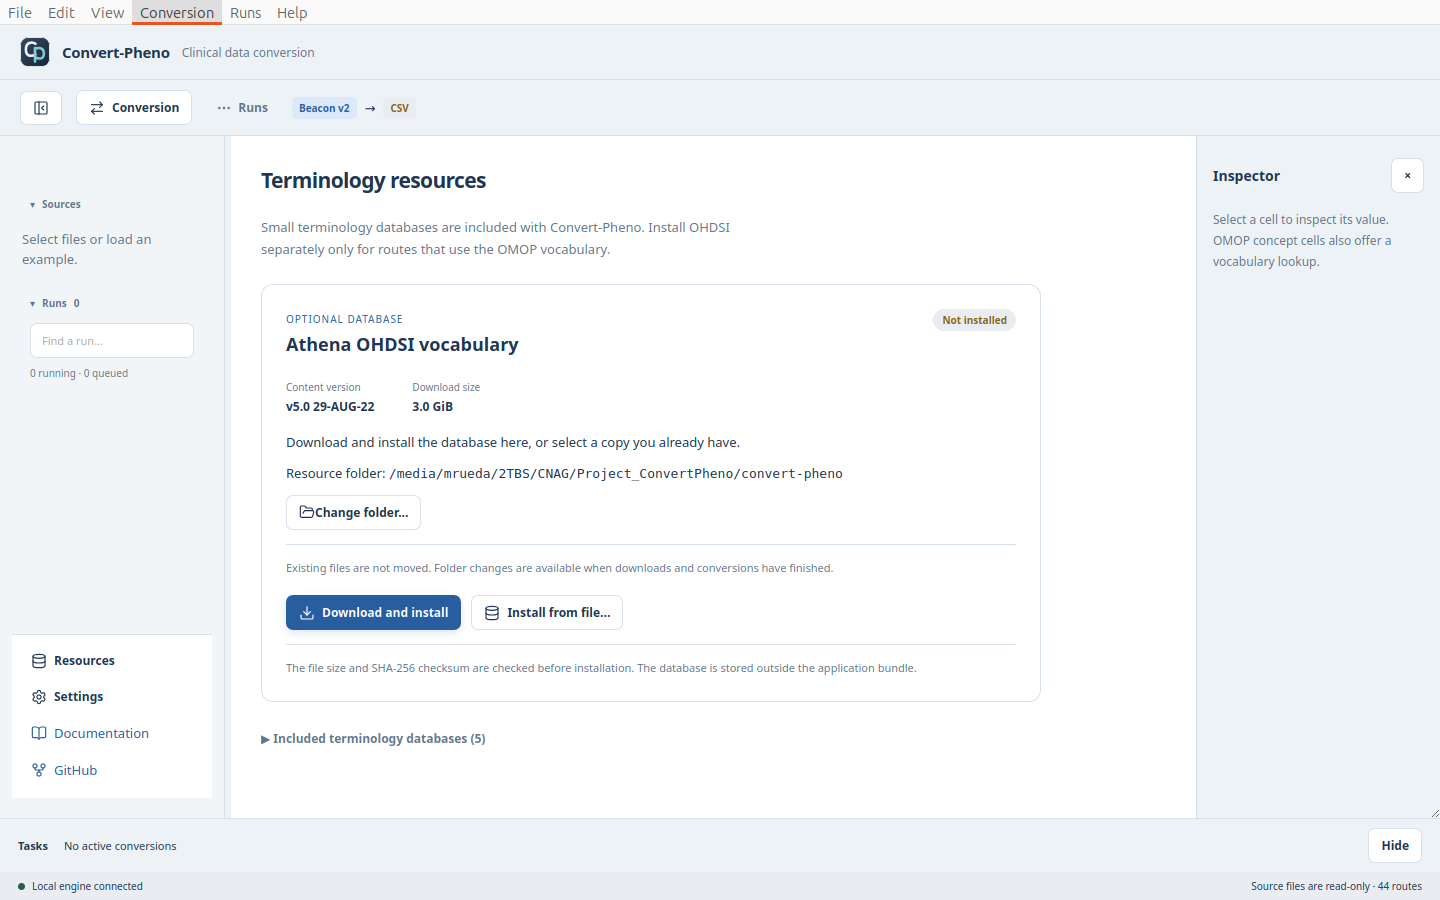
The folder is remembered. Changing it does not move existing files; wait for active downloads and conversions to finish first.
Terminology review
Enable Create terminology audit before converting. It is off by default and adds processing time. Open Terminology Review on the completed run; Unique terms groups repeated decisions across individuals.
Example: CSV input, Beacon output, and terminology review
Choose CSV → Beacon v2 and Load synthetic example. The example loads both the data and its mapping. Select the CSV under Sources to inspect it:
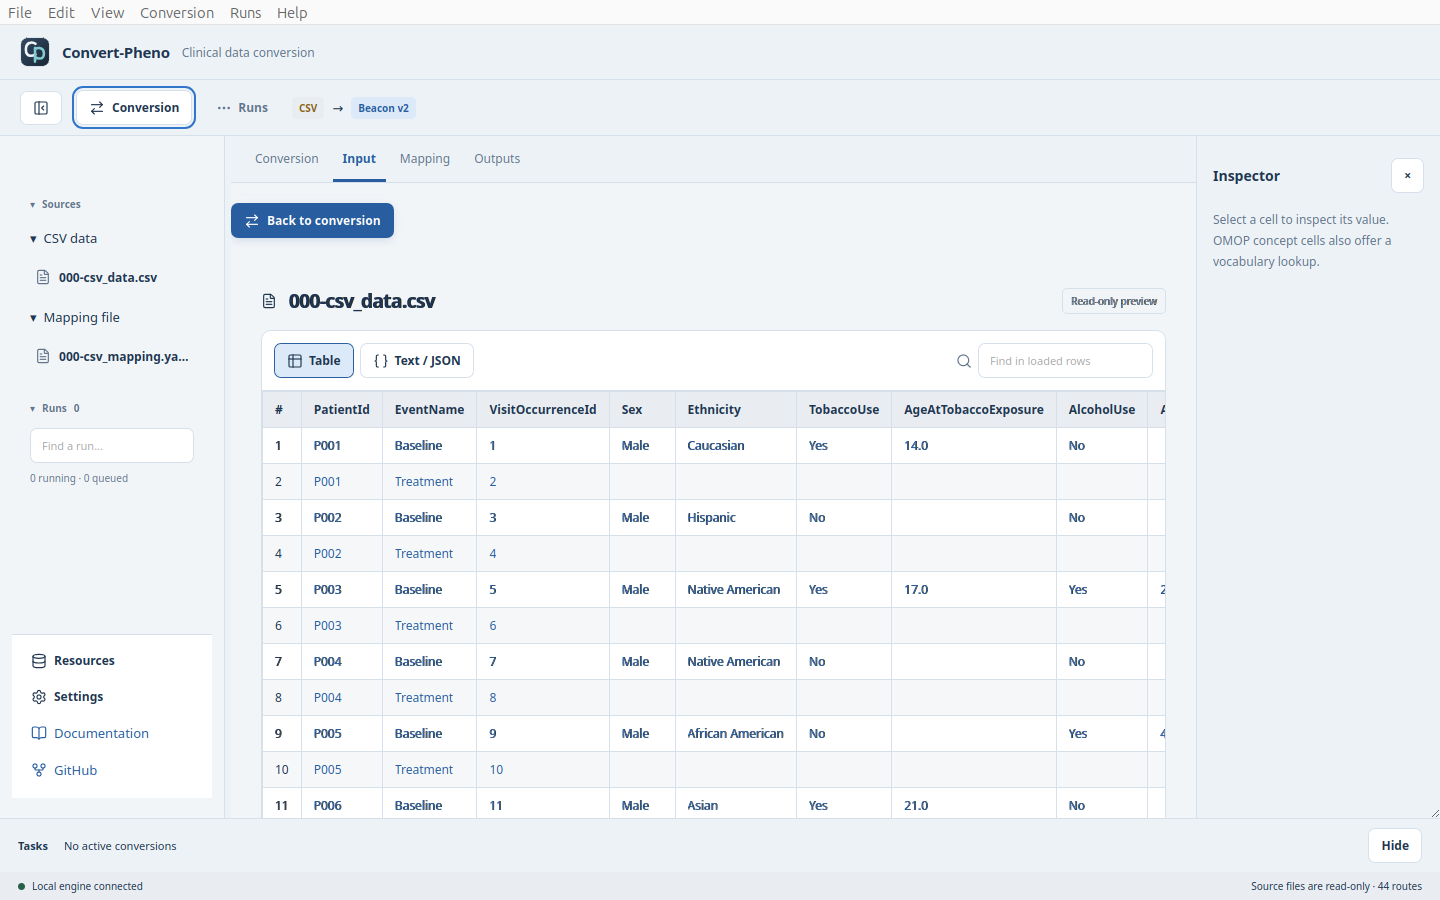
Select Back to conversion, enable Create terminology audit, then run. Outputs contains the converted individuals and the Excel report:
Open Terminology Review to inspect the lookup decisions. Unique terms groups repeated decisions; the complete report retains all occurrences.
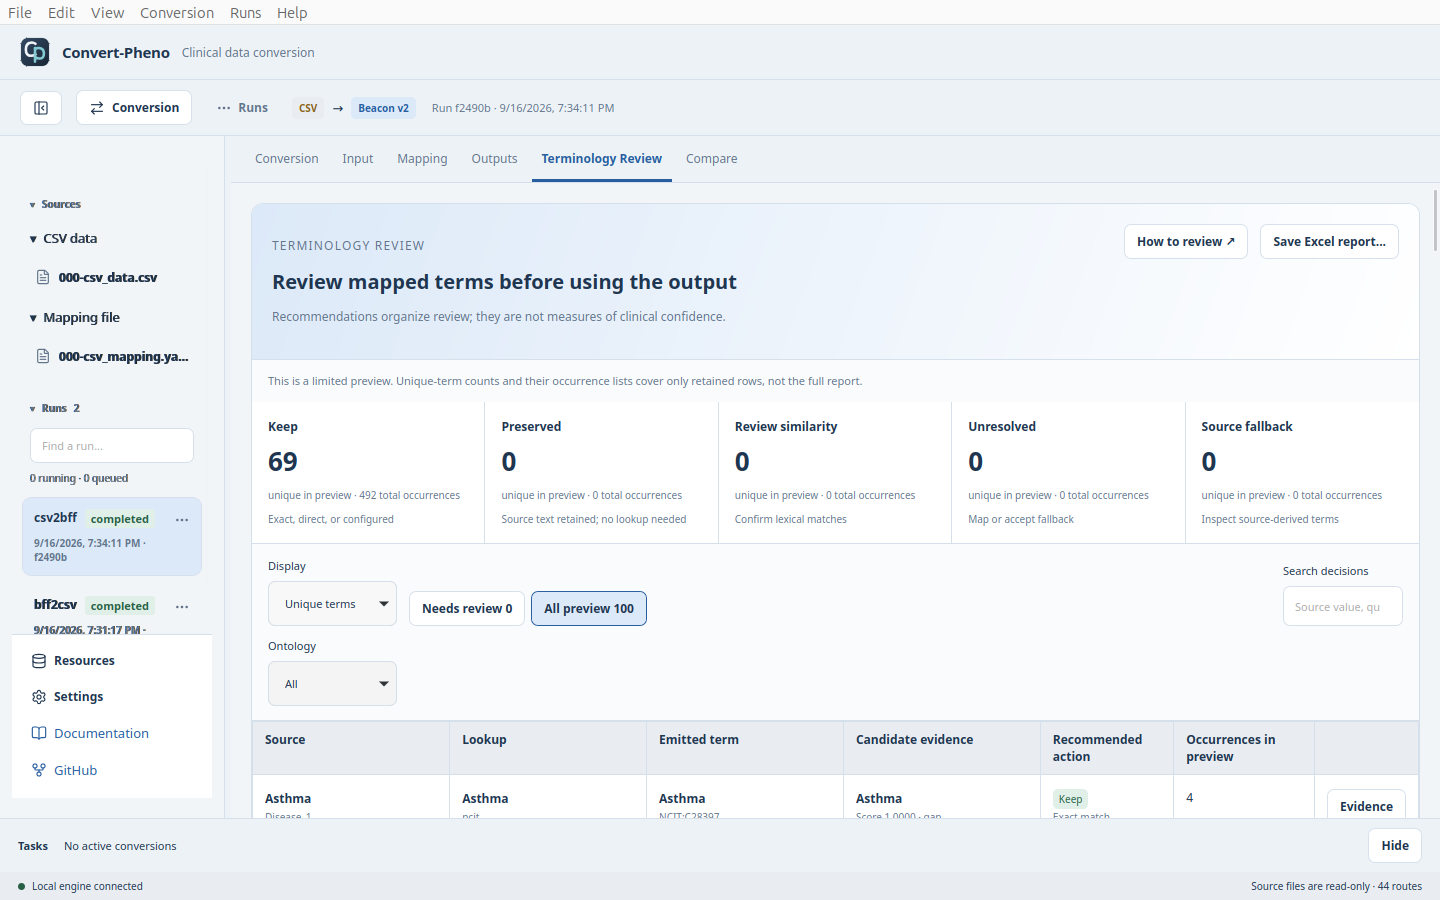
The preview is limited. Save Excel report... exports the complete report. For mapping corrections, edit Mapping, select Validate and use copy, then rerun. Save as... saves the edited mapping separately.
What do Fallback, Unresolved, and Preserved mean?
- Source fallback: a source-derived term was retained without a lookup.
- Unresolved: a lookup found no accepted match; review the fallback or mapping.
- Preserved: source text was deliberately retained without needing a lookup.
For example, geographic origin is not an OMOP ethnicity concept. An OMOP concept
ID of 0 alone does not prove a failed search.
See Terminology Search for decision details.
Reporting a problem
Include the app version, operating system, processor, failed step, and error. Try a synthetic example first. Do not attach participant data or screenshots containing sensitive records.
Development: run from source
With Node.js 24, Rust 1.86, Tauri's platform libraries, Perl, and Convert-Pheno's dependencies installed:
cd app
npm ci
npm run desktop
The original Web App is a legacy demonstration, not this desktop application, and does not reflect current conversion support.