Tutorial: Data Beaconization
Tutorial
Prepare Beacon v2 data from metadata and genomic input.
This walkthrough follows the standard beacon2-cbi-tools path: validate metadata, convert genomic data into BFF genomicVariations, and load the resulting collections into MongoDB.
This tutorial explains the typical end-to-end workflow for preparing Beacon v2 data with beacon2-cbi-tools.
Before starting, complete one of the installation guides:
In the simplest case, you start with:
- metadata, including phenotypic or clinical information
- a VCF file or a SNP-array TSV file
Workflow overview
Most users follow these three steps:
- Validate metadata and generate BFF JSON collections.
- Convert genomic input into BFF
genomicVariations. - Load the resulting BFF collections into MongoDB.
What You Will Produce
individuals.json, biosamples.json, runs.json, datasets.json, and related entity files.
genomicVariationsVcf.json.gzBFF genomic variation output generated from VCF or SNP-array input.
Loaded Beacon collections ready for query and downstream deployment work.
Optional first step: open the runtime environment
If you installed the toolkit with Docker and the container is already running:
docker exec -ti beacon2-cbi-tools bash
If you are using Apptainer or a non-containerized installation, adapt the commands below to your own environment.
Step 1: validate metadata
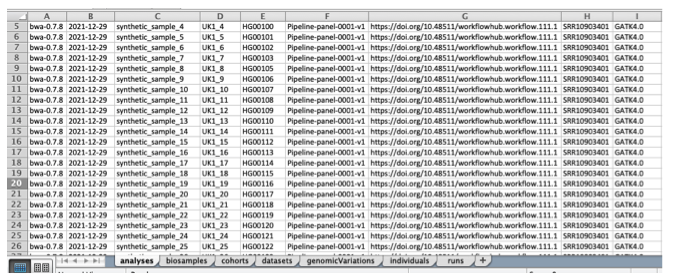
Metadata is usually prepared in an XLSX workbook that follows the Beacon v2 data model. The toolkit validates that workbook and converts it into BFF JSON collections.
As input, you can use the provided template:
You can also use the synthetic cohort workbook as a reference:
The workbook contains sheets corresponding to Beacon entities such as analyses, biosamples, cohorts, datasets, individuals, and runs.
Header names indicate structure:
.usually represents nested objects_usually represents arrays
In most workflows, users do not manually fill the genomicVariations sheet, because genomic variations are generated later from VCF or TSV input.
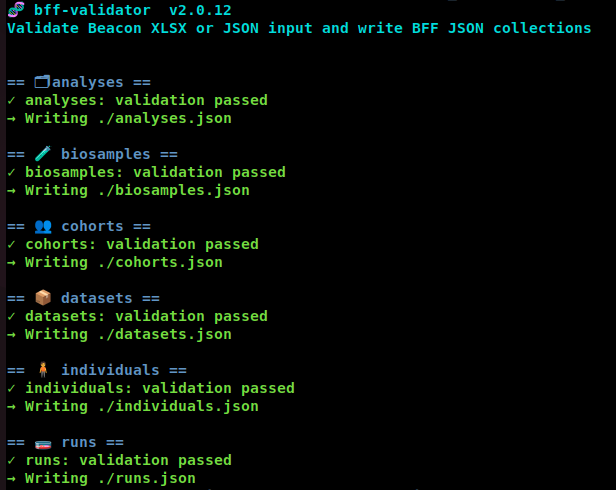
Map your local metadata into the workbook and then validate it:
bin/bff-tools validate -i your_metadata.xlsx --out-dir your_bff_dir
If validation succeeds, the tool writes BFF JSON collections to your_bff_dir.
Common validation behavior
- Errors usually indicate missing required fields, invalid values, or formatting mismatches.
- Warnings may also appear, especially around evolving schema rules such as some
oneOfvalidations. - It is normal to run validation multiple times while refining the workbook.
Example errors
Example 1
Row 1:
/ethnicity/id: String does not match ^\w[^:]+:.+$.
This usually means the value does not follow the expected CURIE format.
Example 2
Row 1:
/id: Missing property.
This means a required id field is missing.
Example 3: warning rather than error
Row 1:
/diseases/0/ageOfOnset: oneOf rules 0, 1 match.
Some schema warnings are expected and can reflect ambiguity in the current schema definitions rather than bad input data.
Unicode input is allowed. If validation errors are difficult to interpret, you can use --ignore-validation to inspect the generated JSON output and then correct the source workbook before validating again normally.
At the end of this step, you typically have several metadata JSON collections in BFF format.
Step 2: convert genomic data
The second step is to generate BFF genomicVariations from genomic input.
VCF input
Use bff-tools vcf for VCF or VCF.gz input:
bin/bff-tools vcf -t 4 -i input.vcf.gz -p param_file.yaml
Minimal parameter file example:
genome: hs37
If you also want HTML output for later browsing with bff-browser:
genome: hs37
bff2html: true
Make sure the genome in the parameter file matches the genome used to produce the VCF. Common values are hg19, hg38, hs37, and b37.
The workflow is aimed at DNA sequencing VCFs such as WES, WGS, and panel data. Structural variants and copy number variation support are still limited.

SNP-array TSV input
Use bff-tools tsv for SNP-array style TSV or TXT input:
bin/bff-tools tsv -i input.txt.gz -p param_file.yaml
This mode is useful for microarray-style data such as 23andMe exports.
Notes on runtime and disk usage
- Processing time depends on both the number of variants and the number of samples.
- During VCF processing, several intermediate files may be created.
- Plan disk space generously. Temporary and output files can be several times larger than the original input.
At the end of this step, you should have the genomic variations BFF output, typically under a run-specific project directory such as:
beacon_XXXXXXX/vcf/genomicVariationsVcf.json.gz
Step 3: load BFF collections into MongoDB
Once you have both:
- the metadata BFF collections from Step 1
- the genomic variations BFF output from Step 2
you can load them into MongoDB with bff-tools load.
Example parameter file:
bff:
  metadatadir: my_bff_dir
  runs: runs.json
  cohorts: cohorts.json
  biosamples: biosamples.json
  individuals: individuals.json
  analyses: analyses.json
  datasets: datasets.json
  genomicVariationsVcf: beacon_XXXXXXX/vcf/genomicVariationsVcf.json.gz
Run the load step:
bin/bff-tools load -p param_file.yaml
If everything is configured correctly, the BFF collections will be ingested into MongoDB.
The load step performs ingestion and indexing. Once data is in MongoDB, you can explore it with mongosh, Mongo Express, your own MongoDB clients, or optional utilities such as bff-portal.
Optional alternative: use full
If you want to combine conversion plus loading in a single command, use:
bin/bff-tools full -i input.vcf.gz -p param_file.yaml
This is convenient when your metadata files are already prepared and your parameter file already points to the correct BFF inputs.
Optional browsing and follow-up
After data preparation:
- use
bff-browserif you want lightweight browsing of static BFF output - use
bff-portalif you want live queries over MongoDB - use
bff-queueif you need to run many jobs on a workstation
Summary
Before treating a run as ready, confirm:
- metadata validation produced the expected entity JSON files
param_file.yamluses the correct reference genome labelgenomicVariationsVcf.json.gzexists in the run directorylog.jsonand stage-specific logs are preserved- MongoDB loading completed without import errors
- a small subset of records has been inspected manually
If you get stuck on installation details or edge cases, continue with the FAQ.